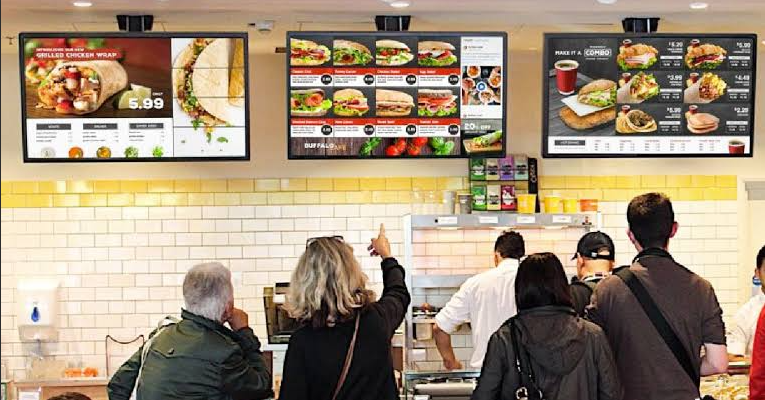
Crafting a Free Digital Menu for Your Restaurant: A Step-by-Step Guide

Creating a free digital menu for your restaurant is a great way to modernize your business and provide an efficient and safe way for customers to access your menu. Here’s a step-by-step guide to help you get started:
Step 1: Plan Your Menu
Before you dive into creating a digital menu, make sure you have a well-thought-out menu with descriptions, prices, and high-quality images of your dishes. Consider organizing it into categories like appetizers, entrees, desserts, and beverages.
Step 2: Choose a Digital Menu Platform
There are several platforms and methods you can use to create a digital menu. Here are a few options:
- Restaurant Website: If you have a website, you can add a dedicated menu page with all your offerings. This gives you full control over the design and content.
- PDF Menu: You can create a PDF version of your menu and make it available for download on your website. Many customers are familiar with this format.
- Menu Builder Tools: Use online menu builder tools and apps like Canva, Adobe Spark, or design-specific platforms like MustHaveMenus or iMenuPro.
- Digital Menu Apps: Consider using dedicated digital menu apps like MenuBoard, Menuat, or UpMenu, which are designed specifically for restaurants.
- Third-party Delivery Platforms: If you’re using delivery apps like UberEats or GrubHub, they often allow you to create digital menus within their platforms.
Step 3: Design Your Digital Menu
Regardless of the platform you choose, ensure your menu is visually appealing and easy to navigate. Here are some design tips:
- Use high-quality images of your dishes.
- Maintain a consistent font and color scheme with your brand.
- Group similar items together for easy browsing.
- Include allergen information if applicable.
- Consider adding QR codes for easy access via smartphones.
Step 4: Include Descriptions and Prices
For each item on your menu, provide a brief description that highlights the key ingredients and flavors. Also, make sure to include prices and any applicable taxes or service charges.
Step 5: Update Your Menu Regularly
Keep your digital menu up-to-date. If you have seasonal or daily specials, make sure to update them promptly. Outdated information can lead to customer frustration.
Step 6: Accessibility
Ensure your digital menu is accessible to all customers, including those with disabilities. Use alt text for images, provide options for screen readers, and maintain a clean and organized layout.
Step 7: Test Your Menu
Before making it public, thoroughly test your digital menu to ensure all links and navigation work correctly. Ask for feedback from your staff and a few customers to identify any issues.
Step 8: Promote Your Digital Menu
Once your digital menu is ready, promote it to your customers:
- Display QR codes at your restaurant entrance, on tables, and on printed materials.
- Share it on your social media accounts and website.
- Train your staff to inform customers about the digital menu option.
Step 9: Gather Feedback
Encourage customers to provide feedback on your digital menu’s usability and content. Use this feedback to make improvements.
Step 10: Monitor Analytics
If you’re using an online platform or app, monitor analytics to see which items are popular and how often customers access your menu. This data can help you make informed menu decisions.
Creating a free digital menu for your restaurant can enhance the dining experience for your customers and streamline your operations. Keep it up to date and responsive to customer feedback to ensure it continues to meet their needs.


