Exploring the Drain Camera Inspection Process

Introduction
When it comes to plumbing and drainage issues, pinpointing the exact cause of a problem is essential for effective repairs. Drain camera inspections have become a game-changer in the world of plumbing, allowing professionals to visually explore the interiors of drains and pipes. In this article, we will take you through a step-by-step guide to the drain camera inspection process. By understanding each stage, you can gain insights into how this valuable technology helps identify and address drainage issues efficiently.
Selecting the Right Drain Camera
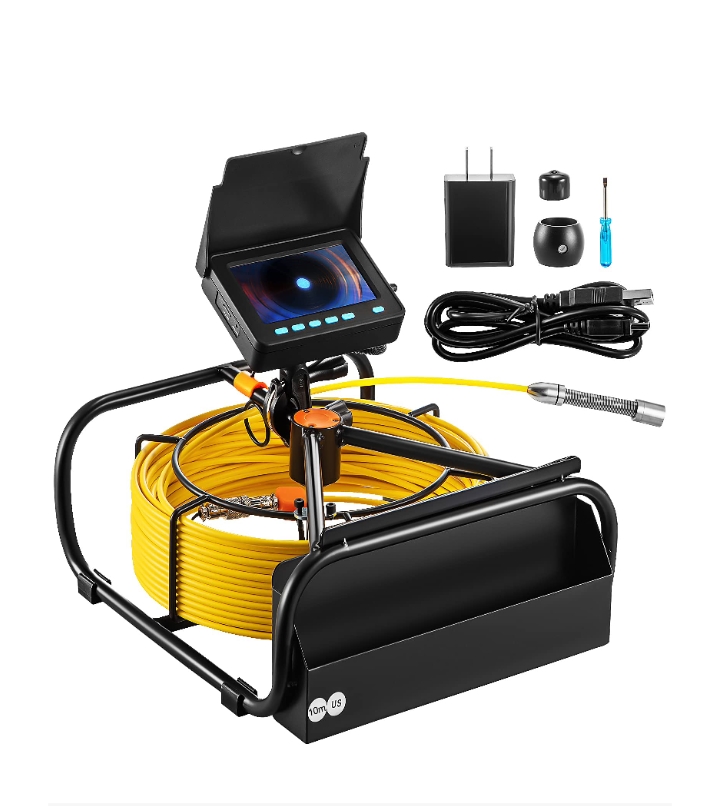
The first step in the Drain Camera inspection process is choosing the right camera for the job. There are various types of drain cameras available, each designed for specific applications. Consider factors such as the drain’s size, material, and the type of inspection you need to perform. Here are some common types of drain cameras:
- Push Rod Cameras: Ideal for smaller drains and residential use.
- Crawler Cameras: Designed for larger pipes and industrial applications.
- Pan-and-Tilt Cameras: Offer flexibility in adjusting the camera’s angle.
- Wireless Cameras: Provide portability and ease of use.
Selecting the right camera ensures that you can match the equipment to the specific requirements of your inspection.
Preparing the Inspection Area
Before you commence the inspection, it’s essential to prepare the inspection area and the drain. Here are some key steps to follow:
- Clear the Area: Ensure that the area around the drain is free from obstructions. This provides easy access for camera insertion and maneuverability.
- Clean the Drain: Use a drain cleaner or water flush to remove debris, dirt, and build-up inside the drain. A clean drain offers a clear view and allows for smooth camera movement.
- Inspect the Camera: Before inserting the camera, conduct a visual inspection of the equipment. Ensure that the camera head and cable are in good condition, with no signs of damage or loose components.
Inserting and Navigating the Drain Camera
Once the area is prepared, it’s time to insert the drain camera into the drain. Follow these steps for successful insertion and navigation:
- Insert the Camera: Gently insert the camera into the drain’s access point. Be cautious not to force it, as this can damage the camera or the drain.
- Monitor the Screen: As you insert the camera, monitor the live feed on the screen to ensure you are navigating in the right direction. Some cameras provide distance markers or GPS systems to track the camera’s position within the drain.
- Use the Camera’s Features: Take advantage of the camera’s features, such as pan-and-tilt capabilities, to adjust the camera’s angle for better viewing. Built-in LED lights are useful for illumination in dark drains.
- Record the Inspection: Many drain cameras allow you to record the inspection. Recording can be invaluable for reviewing findings, documenting issues, and sharing them with clients or colleagues.
Inspecting and Identifying Issues
The main purpose of a drain camera inspection is to identify issues within the drain or pipeline. The camera’s live feed provides real-time visuals, enabling you to spot problems such as:
- Blockages: Look for obstructions or clogs that impede the flow of water or waste.
- Cracks and Leaks: Inspect the drain’s surface for cracks, leaks, or areas where water may be escaping.
- Corrosion: Identify signs of corrosion, which can weaken the drain’s structure.
- Root Intrusions: Tree roots can infiltrate drains, causing blockages and damage.
Identifying these issues is crucial for planning repairs, maintenance, or preventive measures.
Documenting and Reporting Findings
After a successful inspection, it’s vital to document and report your findings. This step ensures that the necessary actions are taken to address the identified issues. Here’s how to proceed:
- Record and Save Footage: If your drain camera allows, record the inspection footage for reference. Save it on a storage device or cloud platform.
- Take Photos: Capture images of specific issues or areas of concern within the drain.
- Create a Report: Summarize your findings in a report, including the location and nature of any issues, as well as recommended actions.
- Share the Findings: Share the report with relevant parties, such as clients or colleagues, and collaborate on a plan for repairs or maintenance.
Conclusion
A step-by-step approach to drain camera inspections is essential for a successful and effective process. Choosing the right camera, preparing the area, careful camera insertion and navigation, thorough inspection, and proper documentation are all critical components of this procedure. By following these steps, professionals can identify and address issues within drains and pipelines, leading to efficient and timely repairs and maintenance, and keeping plumbing systems running smoothly.


